
 |
| an easy snack...yes, there are (tiny) trees there. |
our land is pretty uneven and rocky, and because the orchard is small and new the deer pressure is most likely due to proximity. a couple dozen trees doesn't sound like a destination for a bunch of hungry deer - we just planted stuff in their path. so we chose to use Tenax (tough plastic mesh fencing) supported by poly line, because it's so much easier to put up over rough terrain. a charging buck won't bounce off this fence, so here's hoping they stay away.
our orchard is bounded on two sides by old rock walls. they're most likely from 1800 or so, because they look like sheep fencing (all big stone, no little stuff that piles up around tilled land); and we've heard the walls pre-date the circa 1850 house next door. 200 years later, a lot of the original wall has collapsed and is buried in soil at the wall base - making it impossible to dig postholes. so i came up with a way to fasten the posts to the rock - and while this approach is probably not unique, i haven't seen anything similar described anywhere.
assuming you've got granite or something similarly hard, you'll need a rotary hammer. a regular chuck hammer drill won't cut it, it's got to be an SDS or spline-type hammer. these drills hammer by pneumatics rather than cam action, so there's a lot more force. i have a Makita HR3000C that i like a lot; it's an SDS Plus setup and for me goes about an inch a minute in granite with a 7/8 bit. the Hilti you can rent at Home Depot will work fine too.
when you're drilling take care to protect your lungs - i use a fan to blow the dust away and wear a mask as well. and don't put pressure on the drill, just let the weight do the work.
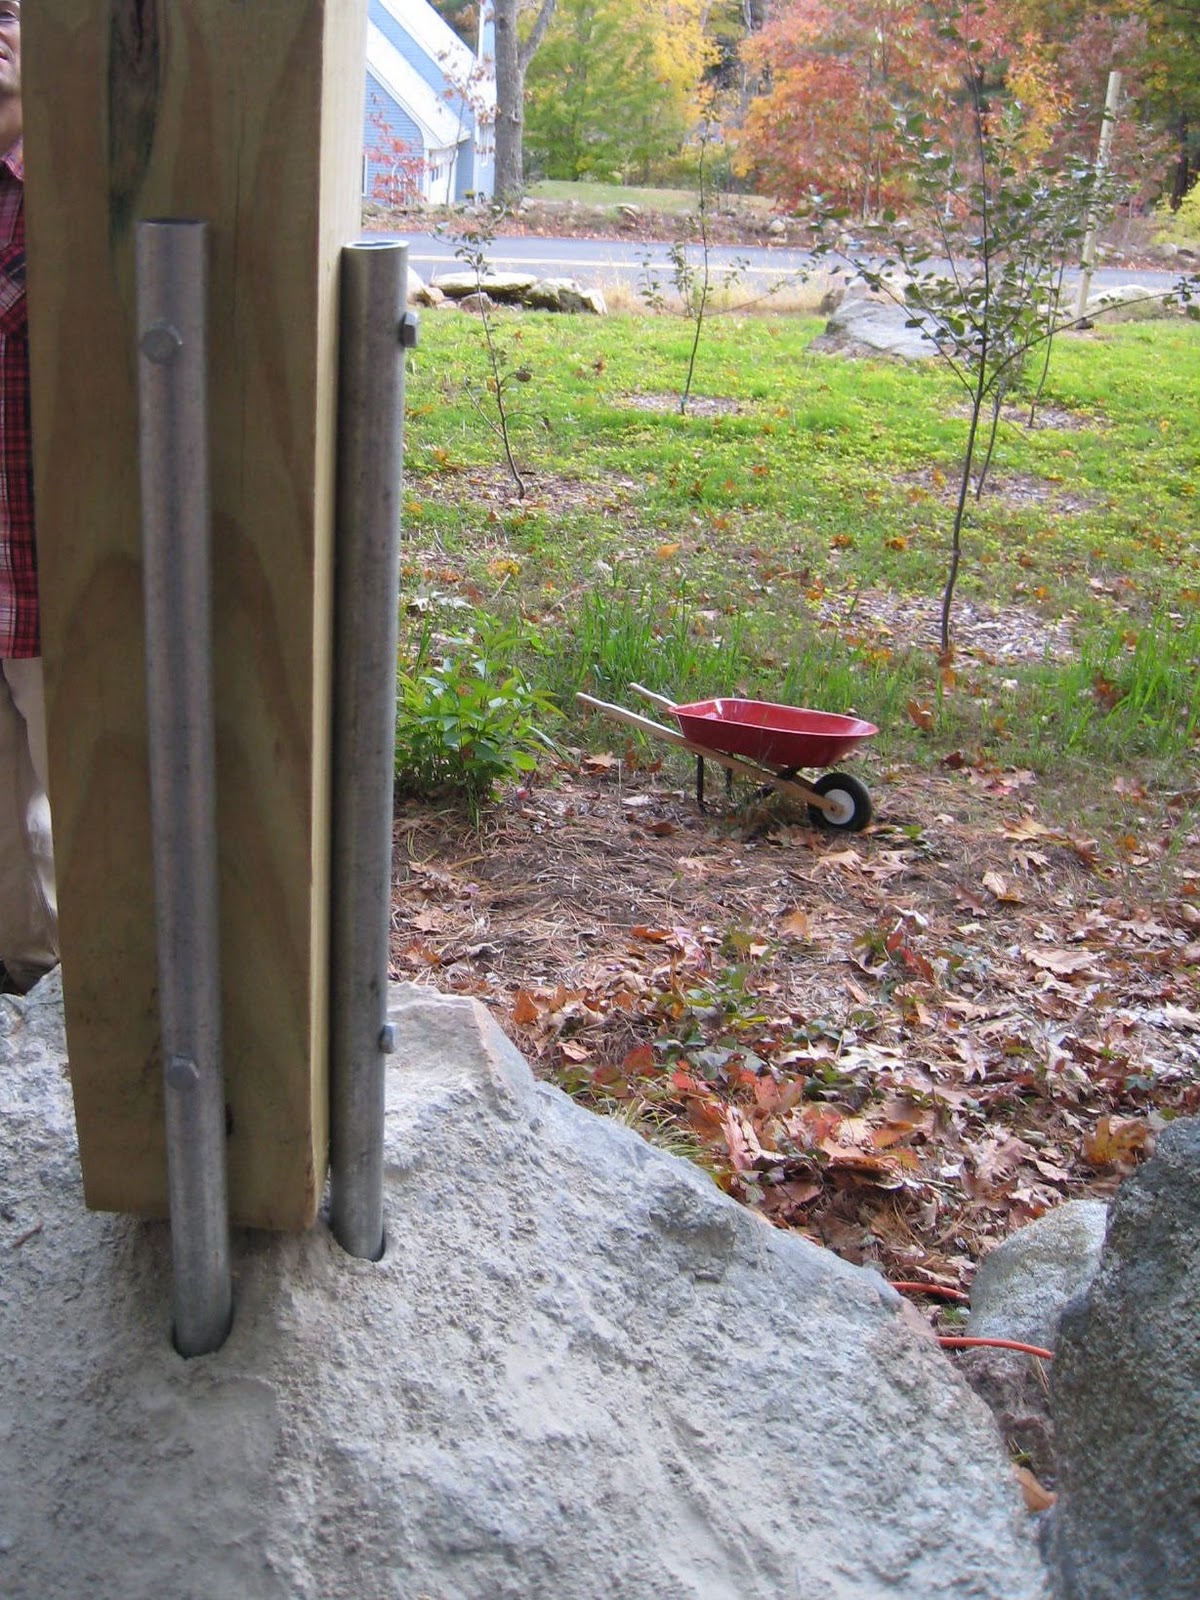
i use 4x4 pressure treated post, this method could work for round ones too. for each post, i drill two holes, centered on adjacent post faces. try to get the holes as plumb as possible, but don't fret, the pipe is easily bent in place. 1/2" galvanized steel pipe fits well in a 7/8" hole. i drill the holes 10-12" deep, then fit 30" lengths of pipe with a hole drilled near the top and bottom of the exposed part.

then, bend the pipes till they're plumb:

now put the post in place and line drill pilot holes for lag screws (it's mighty nice to have a helper for this step...holding a soggy wet PT 4x4 in place with your head is, well, dumb. and i should know...) i use 5/16 galvanized screws and they seem adequate - just be a little careful when torquing and you won't pop the head off:
and that's it for a line post. not bombproof, but it's strong enough to hold the fence up.
 the corners need to be a lot stronger, i brace them with two 2x4's lagged to the post and pinned to a convenient rock, using 1/2 rebar for the pin. 9/16" hole is just right for rebar...but if you space out and use the 1/2" bit by mistake the pin will still go in with some pounding :^)
 it's easiest when you can place the pin horizontally; i use a slight angle so when the 2x4 is put on the pin it's forced against the stone.

drill and place the pin in the stone first, drill the pin end of the 2x4 and put it on the pin, plumb the post and clamp the 2x4 to it, drill and lag screw the brace to the post.
in some places it's easier to have the pin along the length of the brace - or it may be your only choice.
 |
| a corner post pinned to just one big rock |
it's just a bit more finicky to go this route, but again you can bend the pin easily after it's placed. eyeball the direction of the pin and drill the stone and place the pin, i go for about 6" engagement with the brace. drill a 1/2" hole in the center of the end of the brace, bend the pin to match the approx brace angle, then place the brace and tweak the alignment to fit. clamp and lagscrew as above.

and that's about it.
